|
|
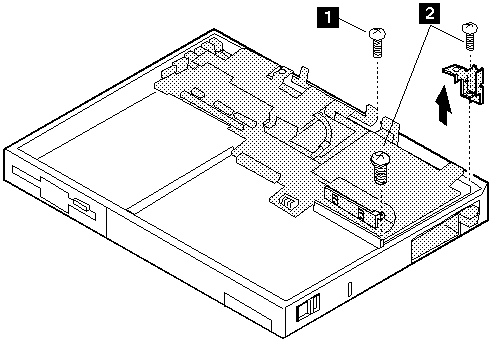
| Step | Screw Location (Quantity) | Length |
|---|---|---|
| 1 | CPU Card to System Board (1) | M2 x 4 mm |
| 2 | CPU Card to System Board (2) | M2 x 5 mm |
NOTE: Make sure you use the correct screws when replacing.
The system board fits exactly in place in the base cover. Align the
system board carefully when removing or reinstalling. Do not force it.
Be careful not to damage the input jacks on the left side of the
computer or the PCMCIA slots on the right side of the computer.
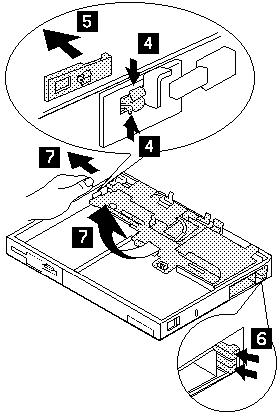
To remove the CPU card from the system board:
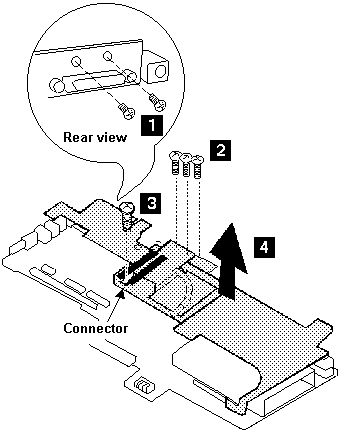
 Be Careful
When connecting the CPU card and the system board again,
use the procedures exactly as shown in the
figures. Make sure that the two CPU card connectors are connected
properly. If these connectors are not properly
connected, the computer will not work.
Be Careful
When connecting the CPU card and the system board again,
use the procedures exactly as shown in the
figures. Make sure that the two CPU card connectors are connected
properly. If these connectors are not properly
connected, the computer will not work.
| Step | Screw Location (Quantity) | Length |
|---|---|---|
| 1 | System Board (2) | M2 x 4 mm |
| 2 | System Board (3) | M2 x 4 mm |
| 3 | System Board (1) | M2 x 4 mm |
NOTE: Make sure you use the correct screws when replacing.
Please see the LEGAL - Trademark notice.
Feel free - send a  for any BUG on this page found - Thank you.