Back to Contents Page

Keyboard Tray

Dell™ Latitude™ X200 Service Manual


Removing the Keyboard Tray

NOTICE: Disconnect the computer and any attached devices from electrical outlets.
NOTICE: To avoid ESD, ground yourself by using a wrist grounding strap or by touching an unpainted metal surface on the computer.
NOTICE: Read "Preparing to Work Inside the Computer" before performing the following procedure.
  1. Remove the battery.

  2. Remove the keyboard.

  3. Remove the palm rest.

  4. Remove the hinge covers.

  5. Remove the display assembly.

  6. Remove the seven M2 x 4-mm screws that secure the keyboard tray to the system board.

NOTE: Each keyboard tray screw has an arrow beside it.
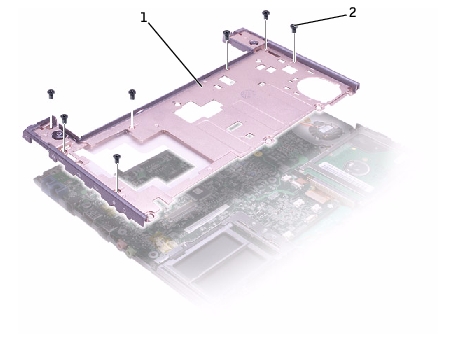
1

keyboard tray

2

M2 x 4-mm screws (7)

  1. Lift the keyboard tray up and out of the bottom case.

NOTE: The air vent on the right side of the computer comes loose when the keyboard tray is removed.
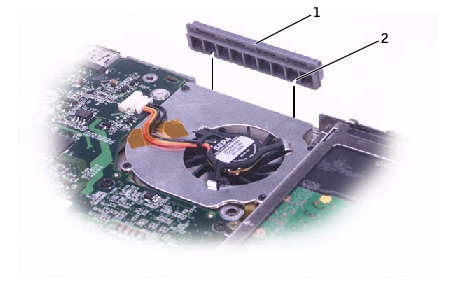
Replacing the Keyboard Tray

  1. Replace the air vent:

    1. Align the two pin holes on the bottom of the air vent with the pins on the bottom case by the cooling fan.

    1. Slide the air vent into the bottom case.

1

air vent

2

pin holes (2)

  1. Replace the keyboard tray.

  2. Reinstall the seven M2 x 4-mm screws that secure the keyboard tray to the system board.


Back to Contents Page