Deskpro EC Series

Removing the System Board


Removing the System Board Bracket

Top of Page
Removing the System Board Bracket
  1. Perform the preparation procedures.
  2. Remove the hood.
  3. Remove the modem.
  4. Remove the network card.
  5. Remove the video card.
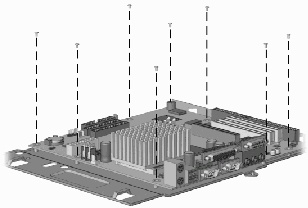
  6. Remove the screws holding the system board bracket to the chassis.
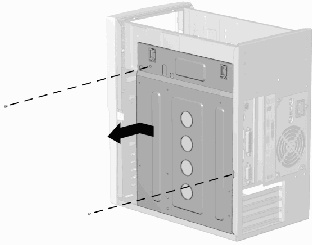
  7. Slide the system board bracket toward the front bezel and carefully pull the bracket away from the chassis.
Removing the System Board Bracket
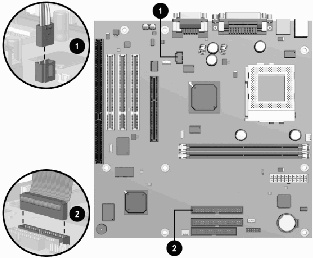
  1. Disconnect the CD audio cable 1 and data cable 2 from the system board.
Removing the System Board Bracket
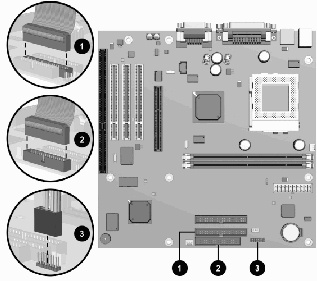
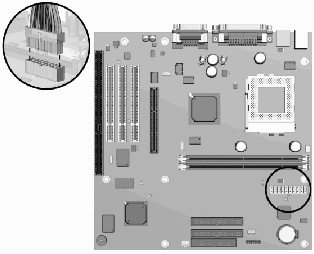
  1. Disconnect the cables for the hard drive data 1 , diskette drive 2 , and power button 3 from the system board.
Note: To replace the system board bracket, reverse this sequence.

CAUTION: When replacing the system board bracket, ensure that the fingers of the I/O panel are properly aligned to prevent them from being bent. If the fingers become bent, the system board may get damaged.

Removing the System Board

Top of Page
Removing the System Board
  1. Perform the preparation procedures.
  2. Remove the hood.
  3. Remove the modem.
  4. Remove the network card.
  5. Remove the video card.
  6. Remove the system board bracket.
  7. Remove the power cable from the system board.
Removing the System Board
  1. Remove the eight screws that secure the system board to the bracket.
Note: To replace the system board, reverse this sequence.


This page was updated on June 02, 2002
Comments about this page
Privacy and Legal Statement